
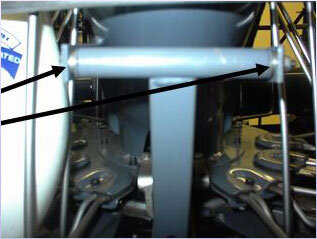
Tech Tip: Interlock Probe
Over a period of years, especially if the mounting bolt has been running loose, the probe can begin to bind if bolt is tightened completely. To correct this, add a #10 s. a. e. flat washer on each side of the spacer. This will give new meat for the spacer to tighten against and will decreases surface tension for the bronze bushing.
Note: This is also handy to convert the old style X-washer pin to the bolt and spacer. Just add a long link bushing to each side to bushing up and a washer on each side.

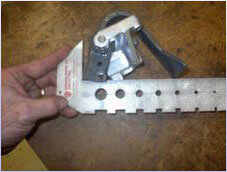
Tech Tip: Interlock Probe Measurement: Pin Release Lever Set-up
In order to ensure the pin release lever is bent/formed correctly and has not become deformed over time, you must first determine what style of lever you have. You can do this by measuring around the outside. The newer versions measure 9 1/8“. If you have an older version, you can simply cut it down to correct length. Put a nice bevel on the cut lever.

Second, you should confirm that the measurement from outside to outside edge is 5 1/8”.
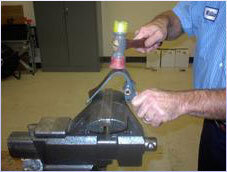
If you need to spread the lever you can lay it against a closed vice (as pictured) and spread the lever using a rubber or plastic hammer/mallet, but be very careful. To make the adjustment smaller, you can compress in a vice using small increments and re-measuring after each compression.
GS Tech Tip: Chain Gear Modification (47-075474-004)
The Setting Tale Chain Gear can, through stress, shear the key on the Drive Shaft. A recent modification added two sets screws to attach the gear to the shaft to prevent shearing. However, an optional solution would be to drill a 1/4" hole through the gear and shaft 90 degrees off of the keyway and install a 1/4" roll pin.

Getting your Pinsetter Ready for the New Season
Maintenance to your pinsetter is important to keep your center running smoothly. In this article, we will discuss some commonly overlooked maintenance items and some tips to help you prepare for your winter season.
Pin Damage
Sometimes pin damage can be easily explained as in the examples below, but some can be much more troublesome to find. Small marks and scratches can accumulate so slowly over a period of time that irreversible damage sneaks up on you and can handicap the appearance, as well as the performance, of the pin.
QUICK TIP: Before you install a full set of new pins for the Fall Leagues, first start with installing one single pin in each pinsetter and run for a shift. Remove the new pin and examine it. If there is any damage, remove the pin and tag the machine for a more in depth inspection.
Usually if pins are getting damaged and showing marks, you can locate the problem area by the evidence of pin chips or shavings. Loose or broken parts tend to scratch the pins, so inspecting all pin delivery paths should lead you to the problem.
Common Problems:
-Pin deck area - Screws, flat gutters, edge boards, and kickback plates
-Broken turret wires and missing deck rollers (A-2)
-Misadjusted turret wires can lead to damage from pulley or center chute (A-2)
-Broken or loose parts on the bin assembly (AMF)
-Missing ball wheel guards (A-2)
-Cracked plows (AMF)
These are just a few examples, but the most important thing to remember is that your problems should be fixed immediately before you risk damaging a new set of pins.
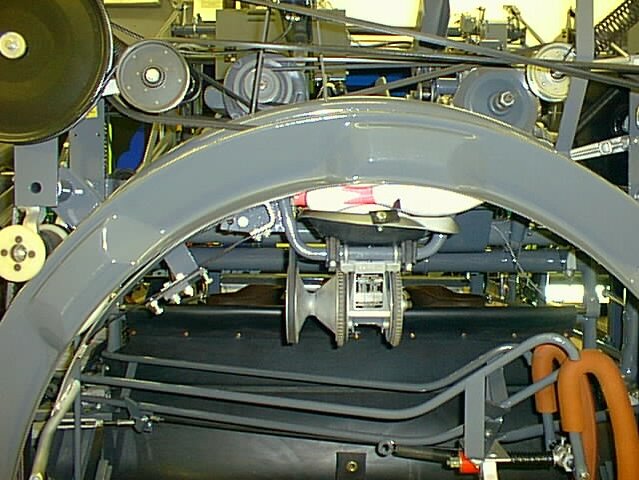
Ball Lifts - See what you can “uncover” before Leagues start!
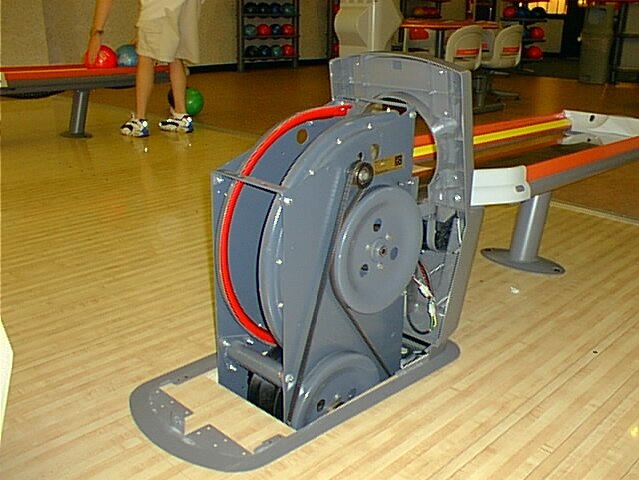
Ball lifts can easily become overlooked throughout the season since they are an efficient piece of equipment. They run pretty much trouble free so the old saying, “Out of sight, Out of mind!” fits here. Simply doing a quick cleaning and inspection can eliminate the chance of unexpected downtime or ball damage.
Inspection:
-Make sure the lift turns on properly when either pinsetter is powered up
-Inspect belt and belt tracking
-Inspect ball lift tires
-Listen for any unwanted noises
-Check for loose hardware
After the ball lift is cleaned, insert two balls in the trap doors, push them into the lift, and watch the transition through the lift. The balls should move up freely with no belt slippage.
Secondly, with the lift off, take a single ball and manually rotate the top pulley to feed the ball through the lift. The ball should transition through the contact points of the two tires and C track smoothly. If you get binding or slipping spots through the transition, you may need to look at your upper and lower tire configuration.
There are several different kinds of tires and each of these have their own characteristics. Mixing and matching tires in a lift can also create different transition characteristics, so find a combination that works well for your center. Smooth consistent transition is the goal here. A binding lift can cause premature belt wear and may also lead to too much motor strain and amp draw, eventually causing the relays to fail.
By performing regular maintenance and catching problems early, you can help keep your center running at its top performance.
Learn about Kegel Pinsetter Parts